👩💻 HTML
(1) What is HTML?
HTML is the code used to structure the content of a web page. All of the pages you made contain HTML.
(2) Where do I put HTML code?
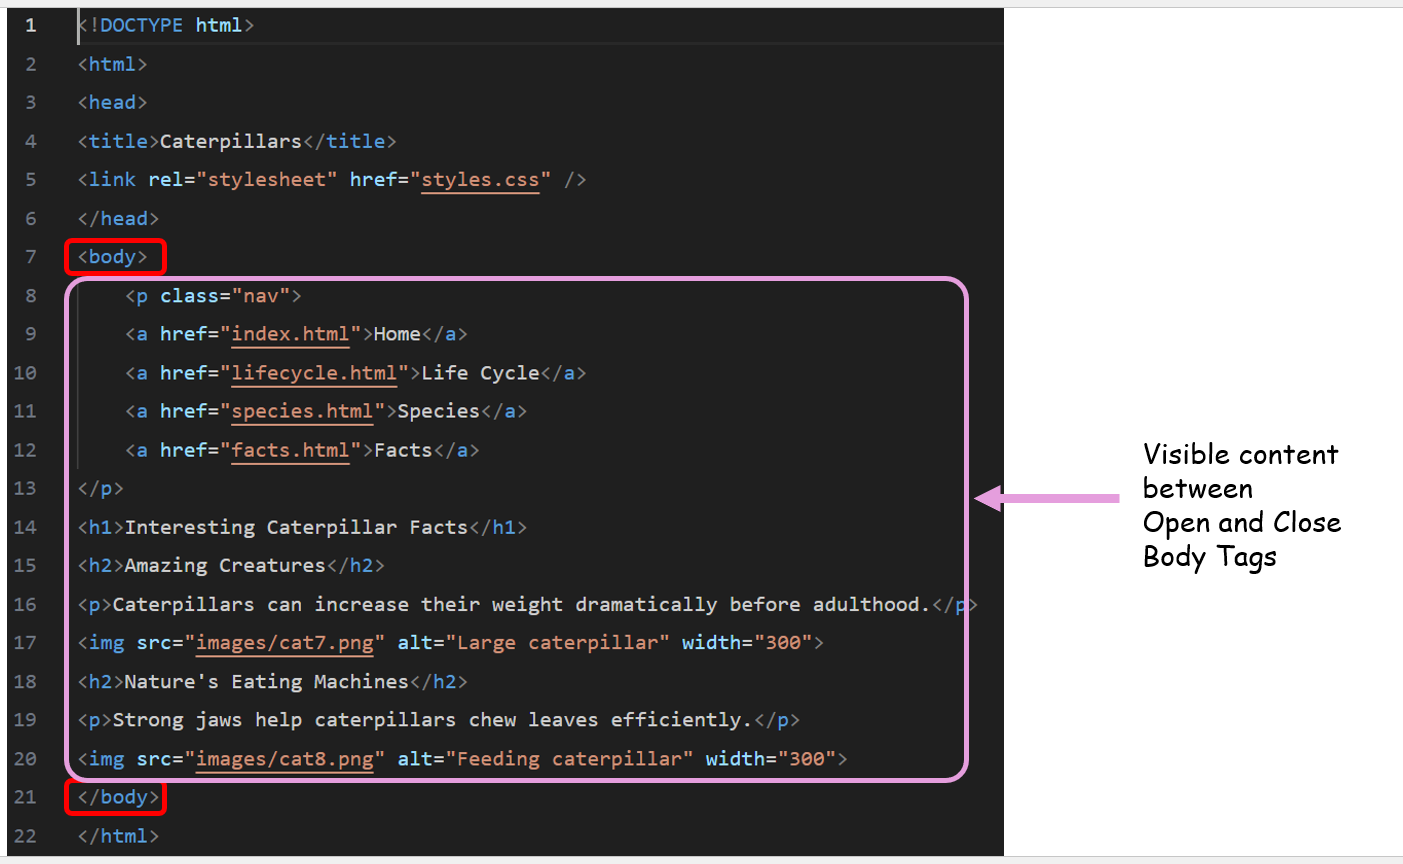
ALL OF THE CODE you add MUST be placed between <body> and </body> on each page. Make sure this has happened!
Click to see example
Right click on the image and select Open Image In New Tab
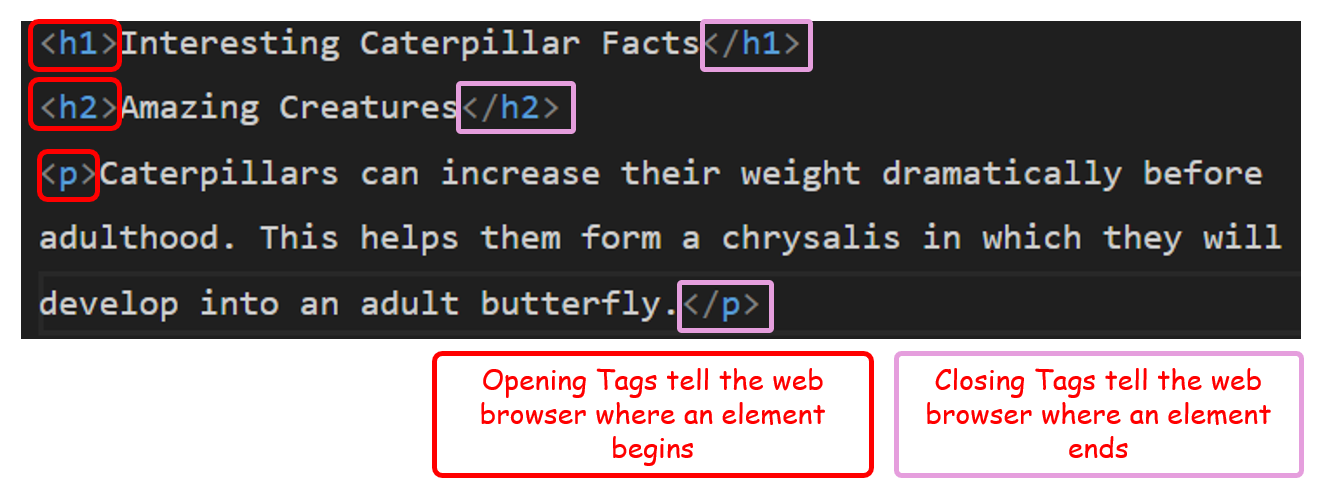
(3) Headings and Paragraphs
Headings and Paragraphs must be used in each section; with h1 used for large headings and h2 / h3 for subheadings.
The p tag is used for paragraphs
Heading and paragraph elements need both an opening and closing tag
Click to see example
Right click on the image and select Open Image In New Tab
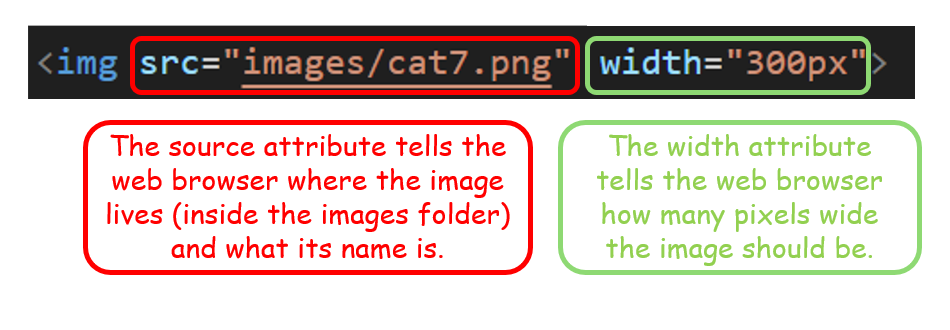
(4) Image Elements
You actually need images stored in the images folder of your website directory.
Watch THIS VIDEO to see how you can do this
Images (at least one) must appear on each page
Image elements only require one tag (no opening or closing tag), and they have several important attributes (source and width).
Click to see example
Right click on the image and select Open Image In New Tab
🦚 Guide To CSS
(1) What is CSS?
CSS stands for cascading style sheets. It allows us to create a separate sheet to control the way elements will look on all pages.
The power of CSS lies in the fact that only one single change needs to be made on the stylesheet for all instances of a particular HTML element to be updated.
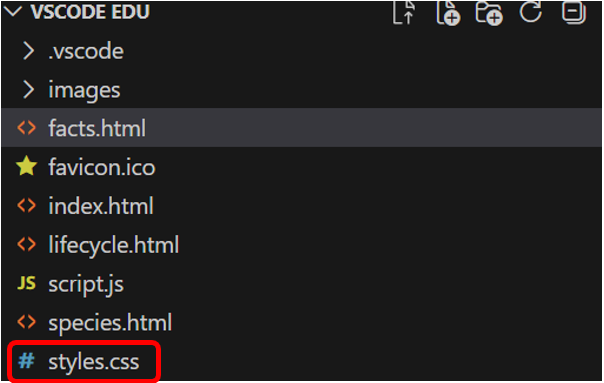
(2) Where do I add my CSS code?
CSS code is written in the stylesheet; usually called styles.css
Click to see where this is found
For the stylesheet to control the styles on a webpage, it must be linked in the head section of the webpage.
Click to see what this looks like
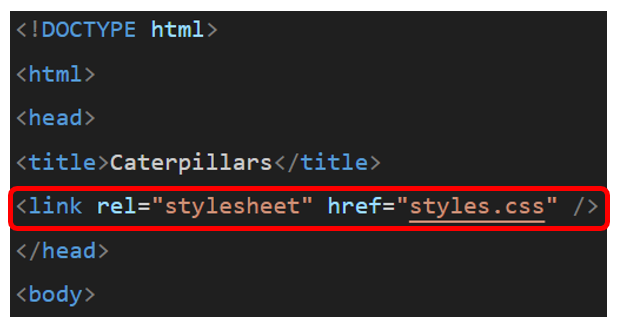
If the stylesheet isn't linked to the page, then none of the styles will be applied to it!
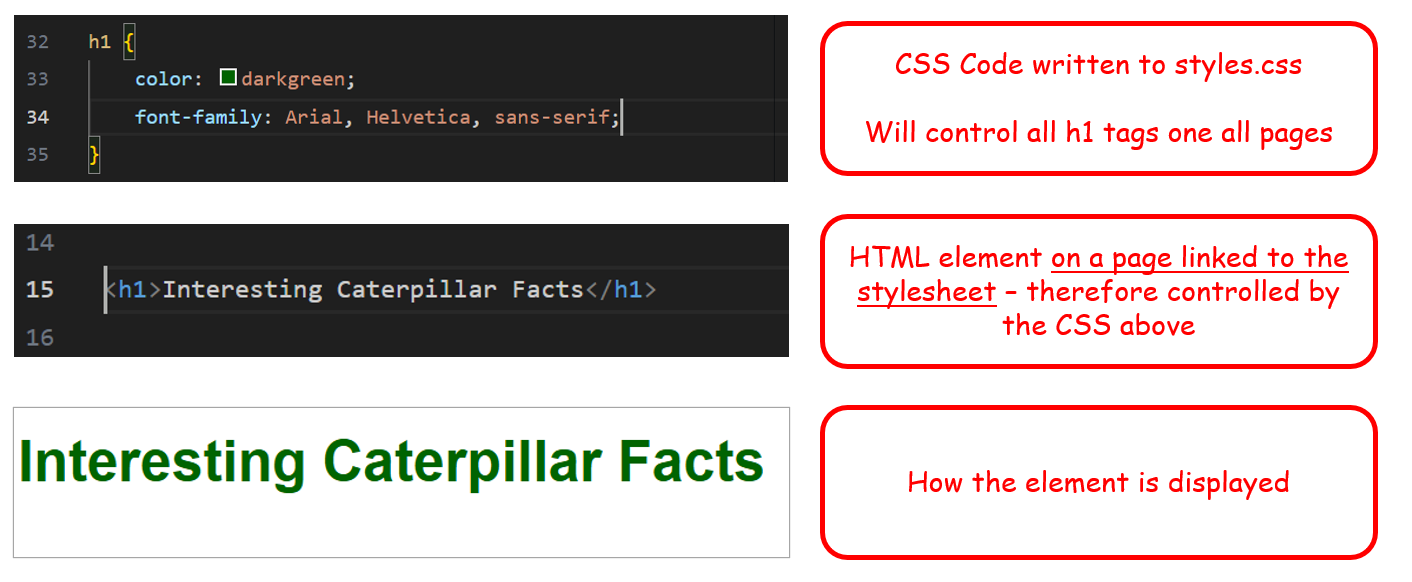
(3) How does it work?
CSS code is written in blocks
Each block begins with the name of the HTML tag it will control (without the angle brackets).
All styles are then written (line-by-line) between a set of curly brackets.
Each style must end in a semicolon, otherwise the stylesheet will not work properly!
Click to see an example
(4) Examples of CSS You Can Use
You don't have to use all of the style rules given for each element.
(a) Page Body
These styles will be applied to the whole page
Click to see
body {

    /* Adds space between the edge of the page and content */
    padding: 20px;

    /* Sets a light grey background colour */
    background-color: #f4f4f4;

    /* Sets the default text colour for all elements*/
    color: #333333;

    /* Sets the main font for the page */
    font-family: Arial, sans-serif;

    /* Sets the default text size */
    font-size: 16px;

    /* Centres the page horizontally by sharing remaining space equally */
    margin-left: auto;

    /* Centres the page horizontally by sharing remaining space equally */
    margin-right: auto;

}
(b) Main Heading (H1)
These styles will be applied to all level 1 headings on the page
Click to see
h1 {

    /* Makes the text bold */
    font-weight: bold;

    /* Changes the colour of the heading */
    color: #2c3e50;

    /* Centres the heading on the page */
    text-align: center;

    /* Adds space below the heading */
    margin-bottom: 20px;

}
(c) Secondary Heading (H2)
These styles will be applied to all level 2 headings on the page
Click to see
h2 {

    /* Changes the heading colour */
    color: #34495e;

    /* Adds space above the heading */
    margin-top: 30px;

    /* Adds space below the heading */
    margin-bottom: 15px;

    /* Draws a line underneath the heading */
    border-bottom: 2px solid #cccccc;

}
(d) Subheading (H3)
These styles will be applied to all level 3 headings on the page
Click to see
h3 {

    /* Changes the heading colour */
    color: #555555;

    /* Makes the heading slightly bolder */
    font-weight: 600;

    /* Adds space below the heading */
    margin-bottom: 10px;

}
(e) Paragraph (P)
These styles will be applied to all paragraphs on the page
Click to see
p {

    /* Sets the size of paragraph text */
    font-size: 16px;

    /* Sets the colour of the text */
    color: #333333;

    /* Controls the spacing between lines */
    line-height: 1.6;

    /* Adds space below each paragraph (if needed) */
    margin-bottom: 15px;

}
(f) Image (IMG)
These styles will be applied to all images on the page
Click to see
img {

    /* Rounds the corners of the image */
    border-radius: 10px;

    /* Creates a border around images */
    border: 3px solid red;

    /* Adds a shadow to images */
    box-shadow: 5px 5px 5px grey;

}
🧭 Navigation Menu
The navigation menu sits at the top of all webpages of a website
It contains all of the same hyperlinks; making it easy for the user to get around.
(1) ⚓ Anchor (Link) Element
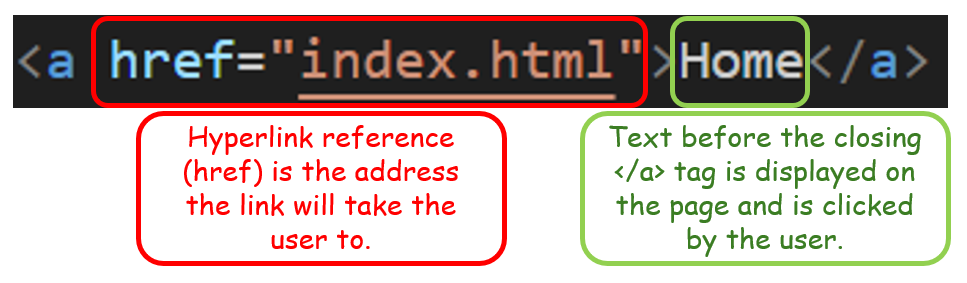
The HTML code for a navigation menu contains anchor <a> elements.
The opening anchor tag contains a hyperlink reference (href) that tells the browser what page to load once the link has been clicked
Before the closing anchor tag is some text that is displayed to the user. When they click on this text, they will be taken to the address given in the href attribute.
Click to see what an anchor tag looks like
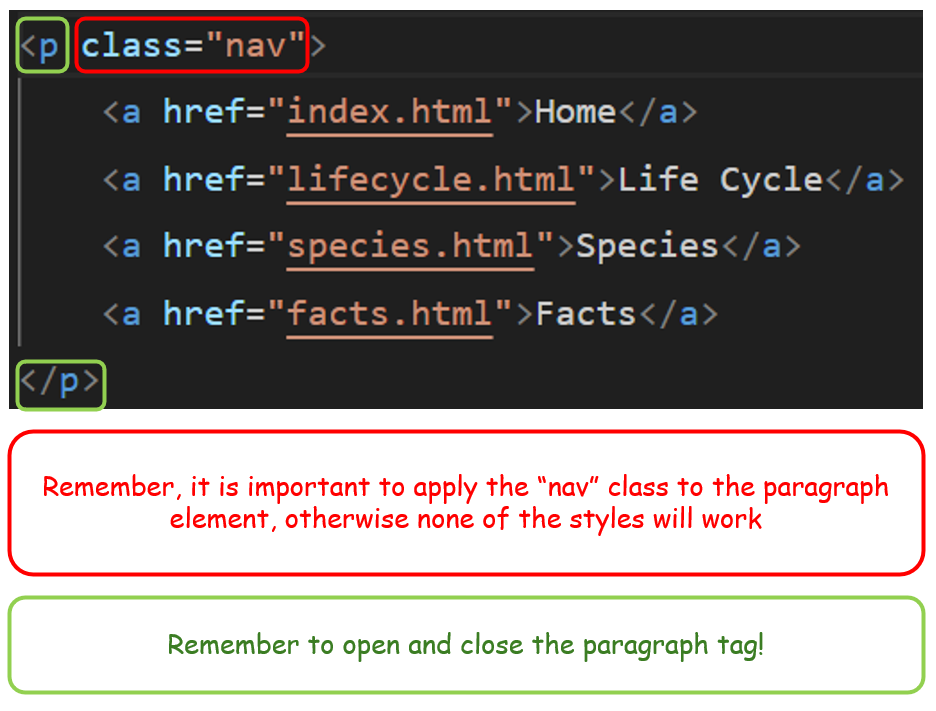
(2) Anchors Combined As A Navigation Menu
To create a navigation menu, several anchor elements are needed.
They are all placed within a paragraph element
This paragraph element is added to a CSS class, so that it and anything it contains can have a separate set of styles from the rest of the page
This goes at the top of each page, just after the <body> tag
Click to see the code for a navigation menu
(3) CSS For The Navigation Menu
Each of these must be added to the document called styles.css
Add each one after another
(a) Navigation Bar (.nav)
These styles will be applied to the navigation bar container
Click to see
.nav {

    /* Sets the background colour of the navigation bar */
    background-color: aquamarine;

    /* Adds space inside the navigation bar (between each element)*/
    padding: 10px;

}
(b) Navigation Links (.nav a)
These styles will be applied to all links inside the navigation bar
Click to see
.nav a {

    /* Adds space around the link text */
    padding: 10px;

    /* Removes the default underline from links */
    text-decoration: none;

    /* Sets the colour of the link text */
    color: #333333;

}
(c) Navigation Link Hover Effect (.nav a:hover)
These styles will be applied when the mouse pointer moves over a navigation link
Click to see
.nav a:hover {

    /* Changes the background colour when the mouse hovers over the link */
    background-color: black;

    /* Changes the text colour when the mouse hovers over the link */
    color: #dfeff5;

    /* Changes the mouse pointer to a hand icon */
    cursor: pointer;

}